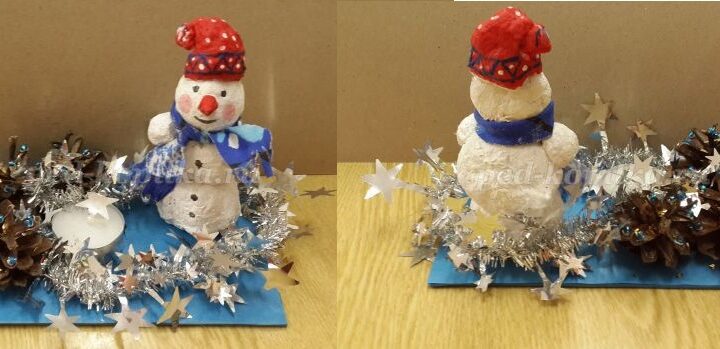
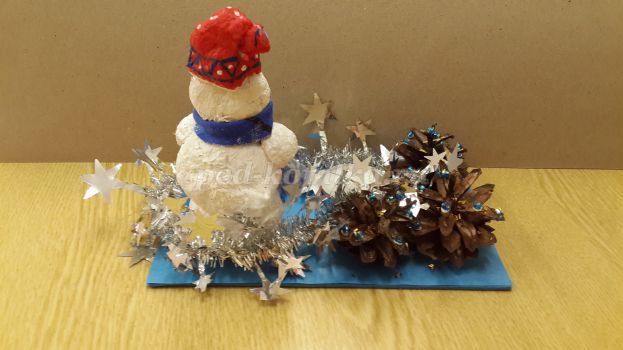
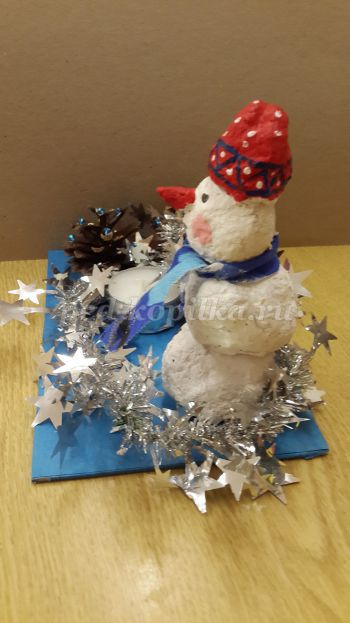
Paper mache snowman candle holder
Candle holder with a snowman made with the papier-mache technique to make with children for Christmas.
Being part of our children’s development is something really fabulous and when we do it with cool crafts like this, what am I going to tell you, they go crazy with joy!
And something that they will love: that their effort shines and that the whole family can see it.
Visita: Otakulandia.net ¡¡los mejores regalos para los peques hechos a mano en crochet!!
With this type of work and crafts, the little ones will improve their fine motor skills, acquiring precision in their fingers.
The patience that is needed, the precision of which we spoke, the independence of being able to do things by themselves and the ability to enjoy all this in company, will make them have a great time while learning great lessons for life.
They will learn to collaborate and work as a team and it will seem normal to do so with other children at school or at home.
Fuente: Ped-Kopilka.ru
Paper mache snowman candle holder
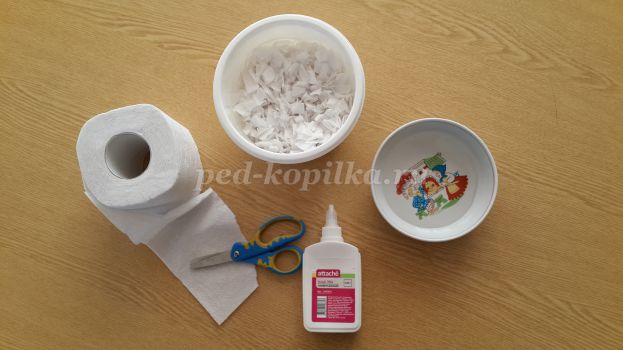
Materials we will need
- 3 small pineapples
- 1 tea light
- Blue colored paper
- Beads or colored sequins
- A strip of fabric for the scarf
- PVA glue
- Colorless Titan glue
- Toilet paper
- Thick cardboard for the base
- Acrylic paints (the only color that we cannot avoid is white, the rest is to your liking; here you will see that red and navy blue are used)
- Brushes
- Scissors
- Tinsel to decorate
Paper mache snowman candle holder
Now let’s go step by step
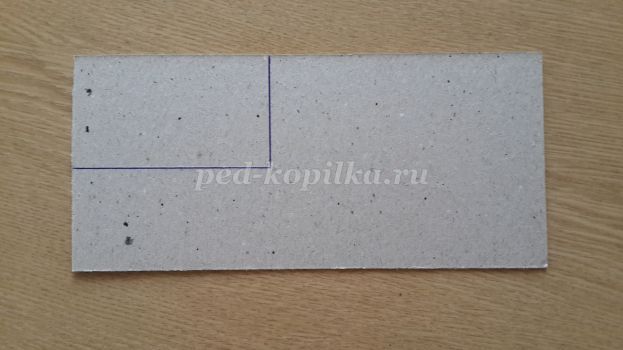
1º.- Cut the thick cardboard into a rectangle of 11 x 16 cm., It will be the base of our candle holder.
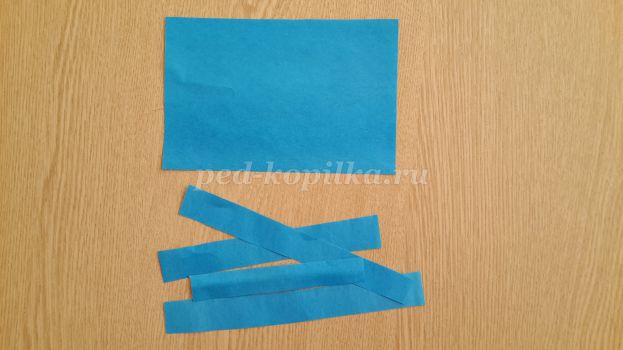
2º.- Cut another rectangle of blue paper the same size as the cardboard, 11 x 16 cm., plus 2 strips of 2 x 11 cm. and another two of 2 x 16 cm.

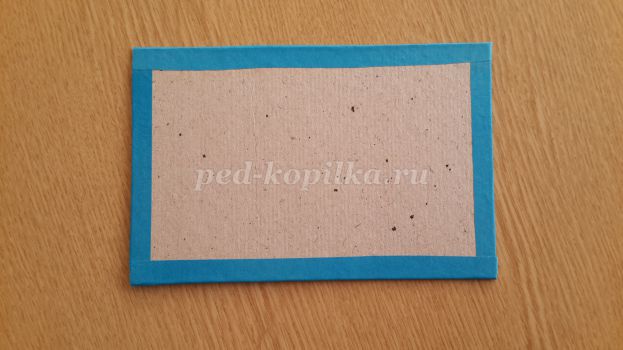
3º.- The first thing we will do to cover the base will be to glue the 4 strips wrapping the edges of the cardboard as seen in the image above. This way it will remain more flirtatious and everything will look homogeneous.
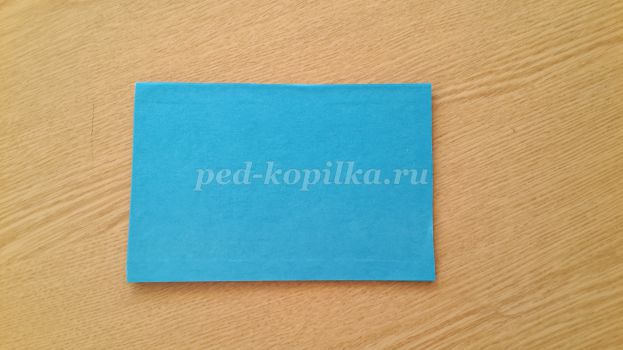
4º.- Once the strips are well glued on the edges, we glue the large blue rectangle on top of the strips, leaving the base lined with it.
5º.- We have the base completed, now we will move on to the protagonist: the Snowman.
We will do it with the papier-mâché technique and I will tell you how things are going, step by step:
a) Cut 5 pieces of toilet paper, the more shredded the better it will be.
b) Add 75 gr. of PVA glue + 30 gr. of water; stir and let rest in a bowl for 4 or 5 hours, until we see that it has become something similar to plasticine.
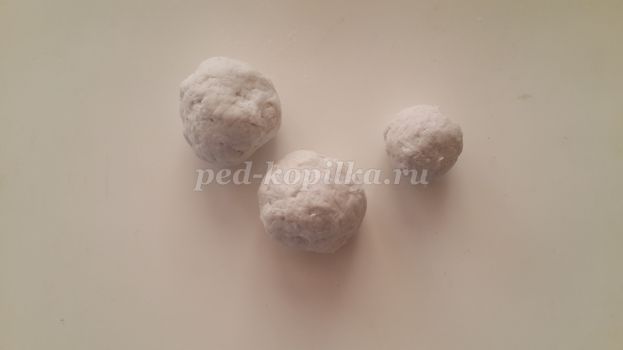
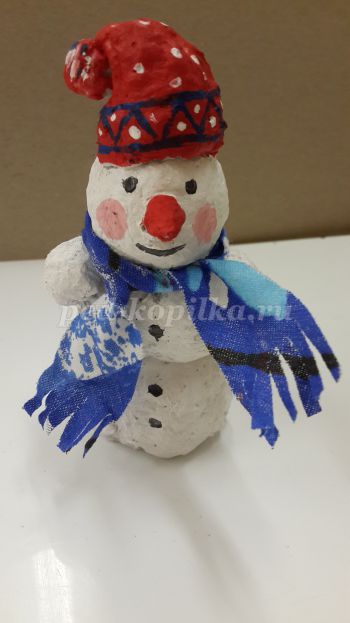
c) We already have the material to make our snowman, now it’s time to make the 3 balls that will form his body and head.
They must be of different sizes: the large one will go below, the medium one in the middle and the small one on the head, although in the photos you will see that there are two balls that are almost the same, it will look better if the one below is larger.
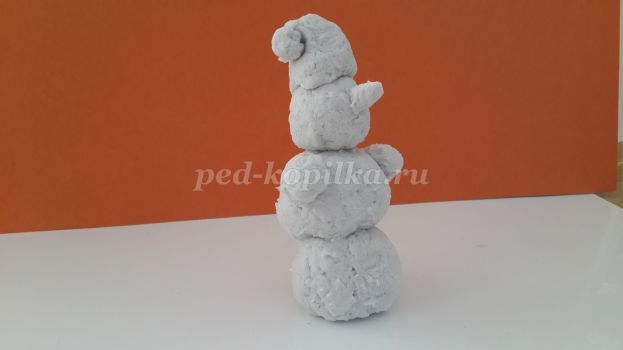
6º.- Now it’s time to assemble the doll but it’s very simple: place the balls well aligned one on top of the other and, as you will see, it has a hat and more pieces, these are made by working the dough that have left over.
** This is optional because except for the nose, it’s essential!! The rest is up to each person’s taste.
For example, I don’t like snowmen with wool hats… but for everyone’s taste… the colors 😉
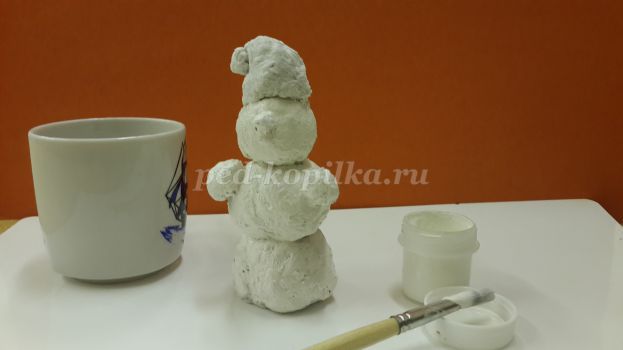
7º.- The humidity of the balls filled with glue should be enough for the doll to stick, but if it has dried out too much, you just have to join it with the same white glue with which we made the balls.
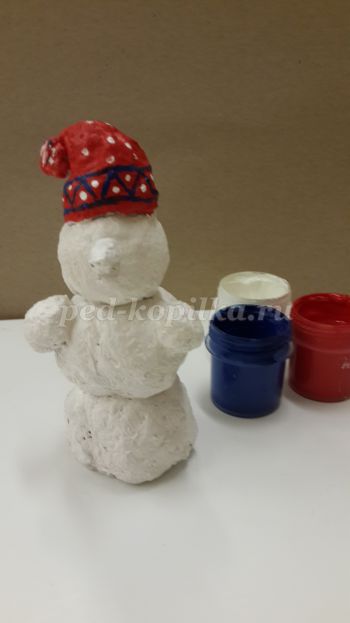
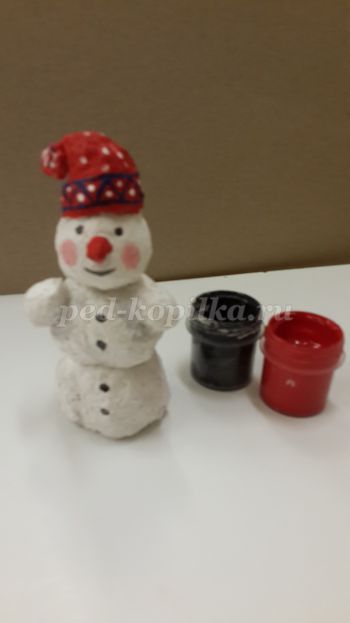
8º.- We paint the doll with white acrylic paint and let it dry before painting the hat in the chosen colors and the rest of the details of the doll: the eyes and mouth, the nose (I would paint it orange because of the carrot 😂 ), the buttons and blushers.
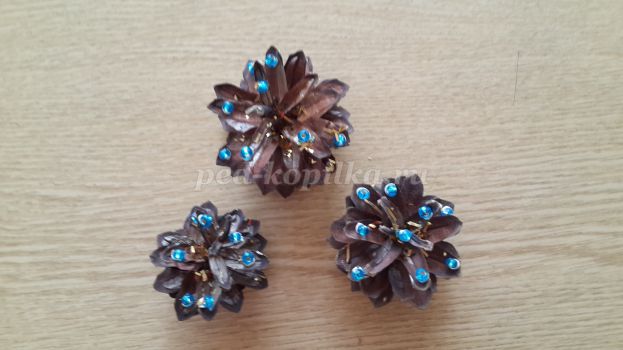
9.- While it dries completely, we can stick the beads or sequins (they look just as cute) on the pineapples with Titan glue.

10.- To glue the pineapples we use the same glue, transparent Titan and they are glued in a corner of the base in the shape of a crescent to leave space for the candle and the snowman later.
** If you have very small children, the candle should not be real; You have very cheap ones of those that turn on and off in any Multiprecios store.
** It is not necessary to glue the candle.
11.- It is time to put the scarf on our funny snowman. You can make a loop or glue it with a drop of Titan glue.
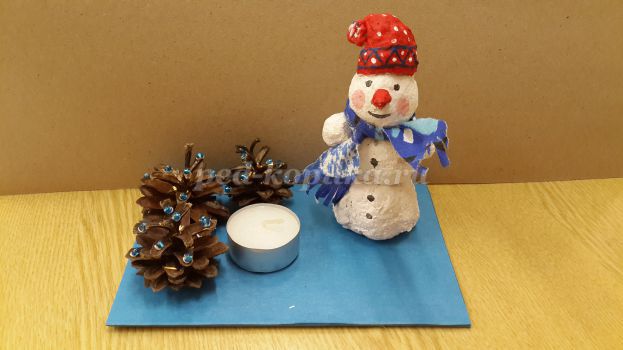
12.- Now we have to position the protagonist in his place 😀, facing the candle and well glued with the Titan glue at its base and… to wait for everything to be dry before finishing decorating our candle holder.
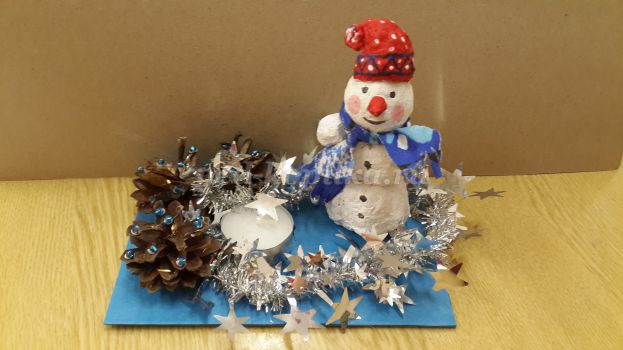
13.- Only the final Christmas detail is missing: the tinsel 😉
It will give it the brightness and joy it needs so that it becomes what we were looking for, the definitive Candle Holder, a precious motif that will decorate any corner of the house.
** Of course the color of the tinsel and how you put it on is also up to you.
There is nothing more fun than turning a craft into something ours with special details, that we invent or changing the colors or the situation of the objects.
** This is a basic idea, then your imagination and that of your little ones will be the ones in charge!! 😉
You will have a blast making this Paper Mache Snowman Candle Holder!!

¡Look!
Portavelas Muñeco de nieve papel maché
Pingback: Let's build Christmas trees for the whole family! | Bebeazul.top